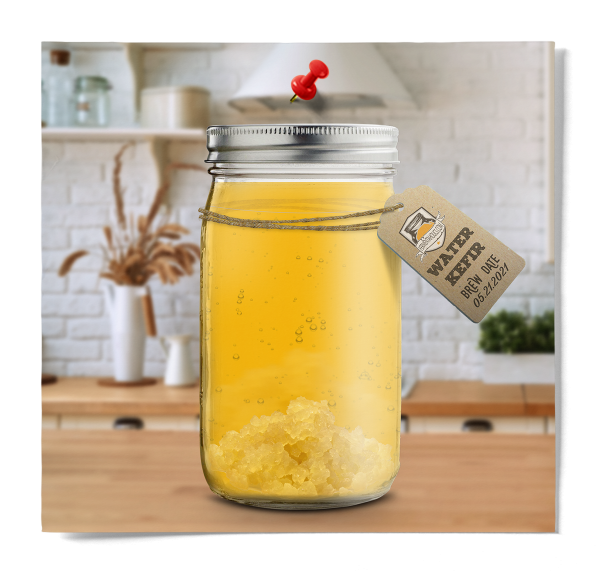
Making water kefir at home is easy. You’ll need a few basic ingredients and supplies, most of which you probably have hanging around your kitchen. Let’s dive right in and show you how to make your own Water Kefir at home!
The good news is that making water kefir at home is easy. It not only saves you money, but it puts you in total control of your batch, which unlocks the unlimited flavoring world, allowing you to customize your water kefir with your favorite flavors, fruits, spices, and herbs. If you have water and sugar at your house, then you can make water kefir!
In this article, we will go over exactly what you’ll need and how to start making water kefir at home.

Water Kefir is the original soda – seriously, people have been brewing this delicious carbonated concoction for hundreds of years and most likely even more. Water Kefir is a natural, light, and refreshing carbonated drink made from water, sugar, and the water kefir grains. These “grains” are not actual grains, but a Symbiotic Culture of Bacteria and Yeast: a SCOBY just like in Kombucha! These little guys turn your sugar water into Water Kefir packed with nutritional probiotics and amazing flavor.
Water Kefir is a fermented drink boasting similar health benefits to other fermented food and beverages. According to the Harvard Health Blog, these benefits include better gut health and improved cardiovascular health. When brewed correctly and under the right conditions, Water Kefir can be brewed indefinitely using the same starter culture, just like a kombucha or sourdough starter. Water Kefir is much easier to make than yogurt, beer, or wine and typically only takes 48 hours for a complete brew. Just add the water, sugar, and water kefir grains to your brewing jar and watch your grains dance and float while nature takes its course and brews you a beautiful drink!
While store-bought kefir is great and there are many great choices on the shelves, regularly drinking kefir at $3-$5 per bottle can add up quickly.
The good news is that you can easily make your own probiotic water kefir that tastes as good as it makes you feel, for a fraction of the cost of store-bought!

Making water kefir starts with the primary fermentation. This consists of fermenting sugar and water to create a base that is later flavored and carbonated in bottles. For those who prefer little to no carbonation, you can drink your water kefir after the primary fermentation is finished. If you’d like to add flavor and carbonation, you can do a secondary fermentation. The primary fermentation is when you make water kefir, and the secondary fermentation is when you take the water kefir, bottle it, and add flavor plus carbonation.
#1
The primary fermentation is the first step of the water kefir making process. This is where your water kefir grains, or SCOBY, transform regular sugar water into the refreshing water kefir we love. At the end of this stage, you will have water kefir, but it will be unflavored and flat.

#2
This is the step where you bottle your water kefir. In addition, this is where you carbonate and/or flavor your water kefir by adding sugar and flavors. This step involves adding a bit of sugar or flavor to bottles with lids designed to hold the pressure of fermentation and then letting them ferment a little longer. This second fermentation allows the yeast to naturally carbonate the beverage in the sealed bottle.
To start making water kefir, you’ll need a few supplies and ingredients:
1
Glass Jar: Glass or lead-free porcelain are popular options for making water kefir. Choose anything non-porous and non-reactive. Mason jars work great.

2
Organic Sugar: Without sugar, there wouldn’t be any fermentation taking place. The yeast eats sugar, breaking it down into carbon dioxide and alcohol, which then gets broken down by the bacteria into healthy organic acids. Since you’re saving so much money making your water kefir, I recommend purchasing organic ingredients.
3
Water Kefir Grains | SCOBY (Symbiotic Culture of Bacteria and Yeast): Water kefir grains are small, translucent, gelatinous clusters composed of a symbiotic culture of bacteria and yeast (SCOBY). The SCOBY is the group of living microbes responsible for transforming sugar water into probiotic-rich water kefir. Water kefir grains are gluten-free and dairy-free.
4
Filtered Water: As the most abundant ingredient in water kefir, you want to make sure that the water you use is high quality. Tap water contains chlorine and chloramines that inhibit microbe growth (not good for fermentation). Most cheap, carbon water filters will remove chlorine and chloramines so those will suffice. But as a fallback, spring water is always a favorite of your water kefir grains.

5
Temperature Strip: Attach an adhesive temperature strip to the side of your brewing vessel. These temperature strips allow you to monitor the temperature of your water kefir brew, so you know if your batch is being kept at the proper temperature.
1
serving15
minutes2-5
DaysKefir Brewing Jar (1 Quart), Breathable Cloth Cover, And A Rubber Band.
3 Cups Filtered Water*
1/4 Cup Organic Cane Sugar
Water Kefir Grains, 70 g live water kefir grains
Thermometer Or Adhesive Temperature Strip
Funnel
Airtight Bottles – Pressure Holding, Airtight Bottles For The Secondary Fermentation, And Storing Your Finished Brew.
In a clean, quart-sized jar, add 1/4 cup of organic cane sugar.
Add the three cups of filtered water to the jar and mix ingredients until sugar is almost completely dissolved in the water.
Add your kefir grains into the quart-sized jar with water and sugar.
Place a breathable cover over the opening of the jar and secure it with a rubber band. Place the jar in a warm location (Ideally 76-78°f) out of direct sunlight and let it ferment.
After 24 hours, taste the kefir. It will likely be sweet, but some fermentation has started so that you can familiarize yourself with the subtle changes over time. The fermentation time depends on the temperature and activity of the grains. The closer you are to the ideal temperature, and the more often you brew with the grains, the more active they will be. Taste and pH are the best indicators of the fermentation activity, not simply the time passed or what’s going on visually. The final pH will be around 3.5, and then you are ready to bottle and flavor if desired!
Strain the kefir grains from the liquid, making sure to reserve the grains for future batches. Pour the kefir into 12 or 16 fl oz bottles for easy storage. At this point, your kefir is plain and won’t have much fizz. If that’s how you want it, you are done! If you want to add flavor and carbonation, continue to the secondary fermentation instructions.
When you’ve finished your primary fermentation, you can bottle and enjoy it still (non-carbonated), or move on to the secondary fermentation. The secondary fermentation is where you flavor and carbonate your water kefir in bottles. If you’re like most and want to go this route, head on over to our post to learn all about water kefir secondary fermentation: Water Kefir Secondary Fermentation: How to Bottle, Flavor, and Carbonate Water Kefir.
